Add-In NG Configuration
AzureAD is now called Entra ID.
Change the AzureAD App to work with Add-In NG
In order for the Qiata Outlook Add-In NG to work with Office SSO, the application registration must be changed. This documentation shows only the changes that need to be made to a standard application registry. Therefore, make sure you have read the Connect AzureAD documentation and that this application works with Qiata.
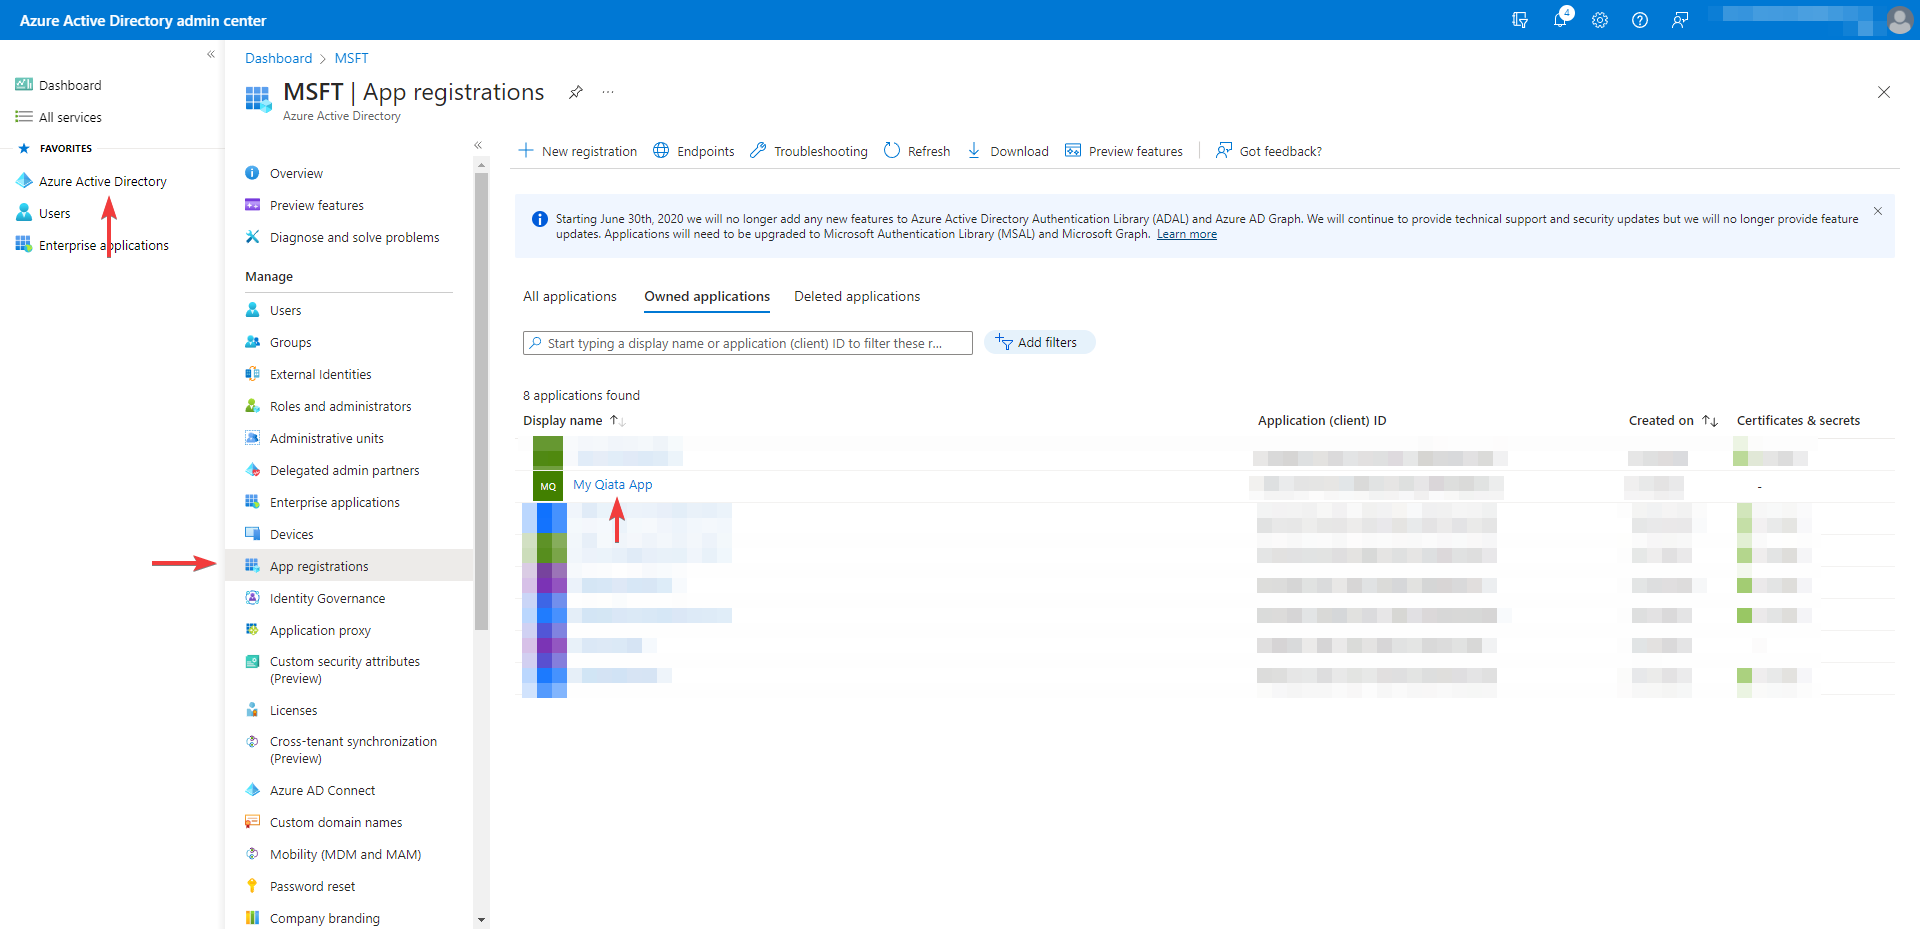
Log in to your AzureAD as an administrator and navigate to the application you created for Qiata.
Add Client Secret
Select Certificates & secrets. Then on the Client secrets tab, select New client secret.

- Click on New client secret
- Add a description for your client secret
- Select an expiration date for the secret or specify a custom lifetime
- Select Add. The new secret is created and the value is temporarily displayed
Record the value of the secret to use it in Qiata. This secret value will never be displayed again after you leave this window.
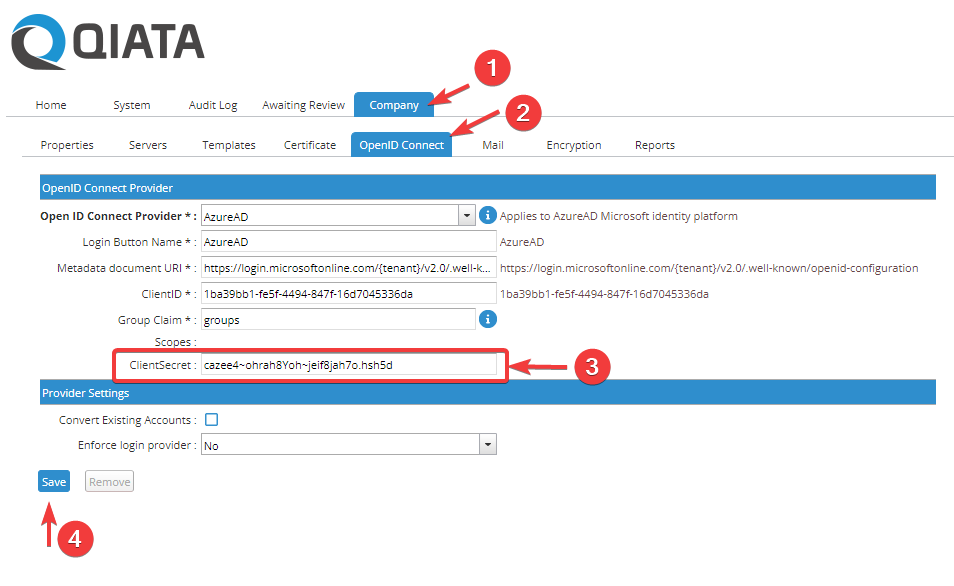
Add Client Secret to OpenID Connect configration (Qiata)
Log in to Qiata as the company administrator and add the client secret you just created to the OpenID Connect configuration.
Expose a web API
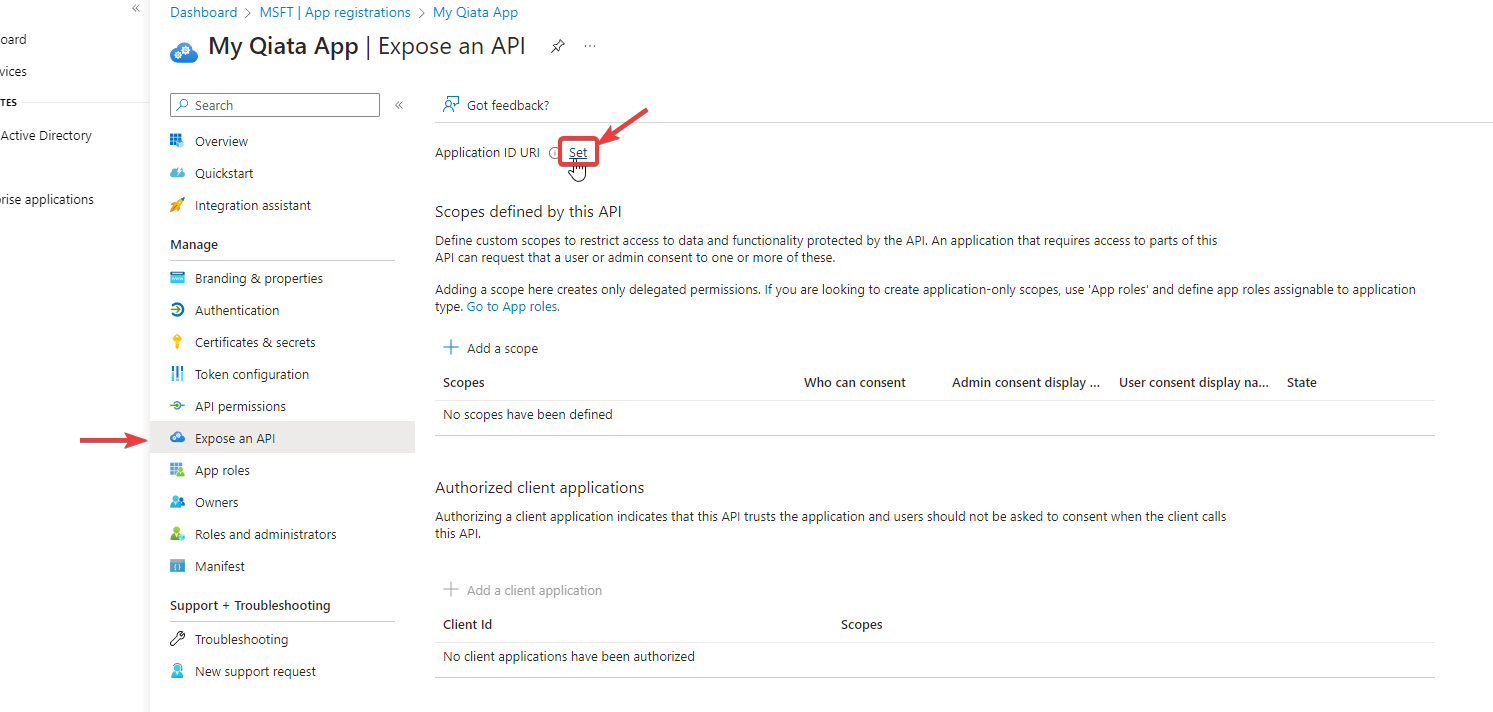
- Select Expose an API
- Select Set to generate an application ID URI
- Update the application ID URI to
api://<FQDNofQiata>/qiataoutlookaddin/<app-id>
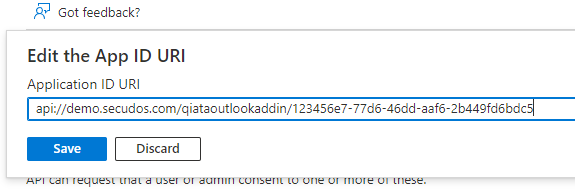
The Application ID URI is pre-filled with app ID (GUID) in the format api://<app-id>. The application ID URI format should be: api://<FQDNofQiata>/qiataoutlookaddin/<app-id>
Add a scope
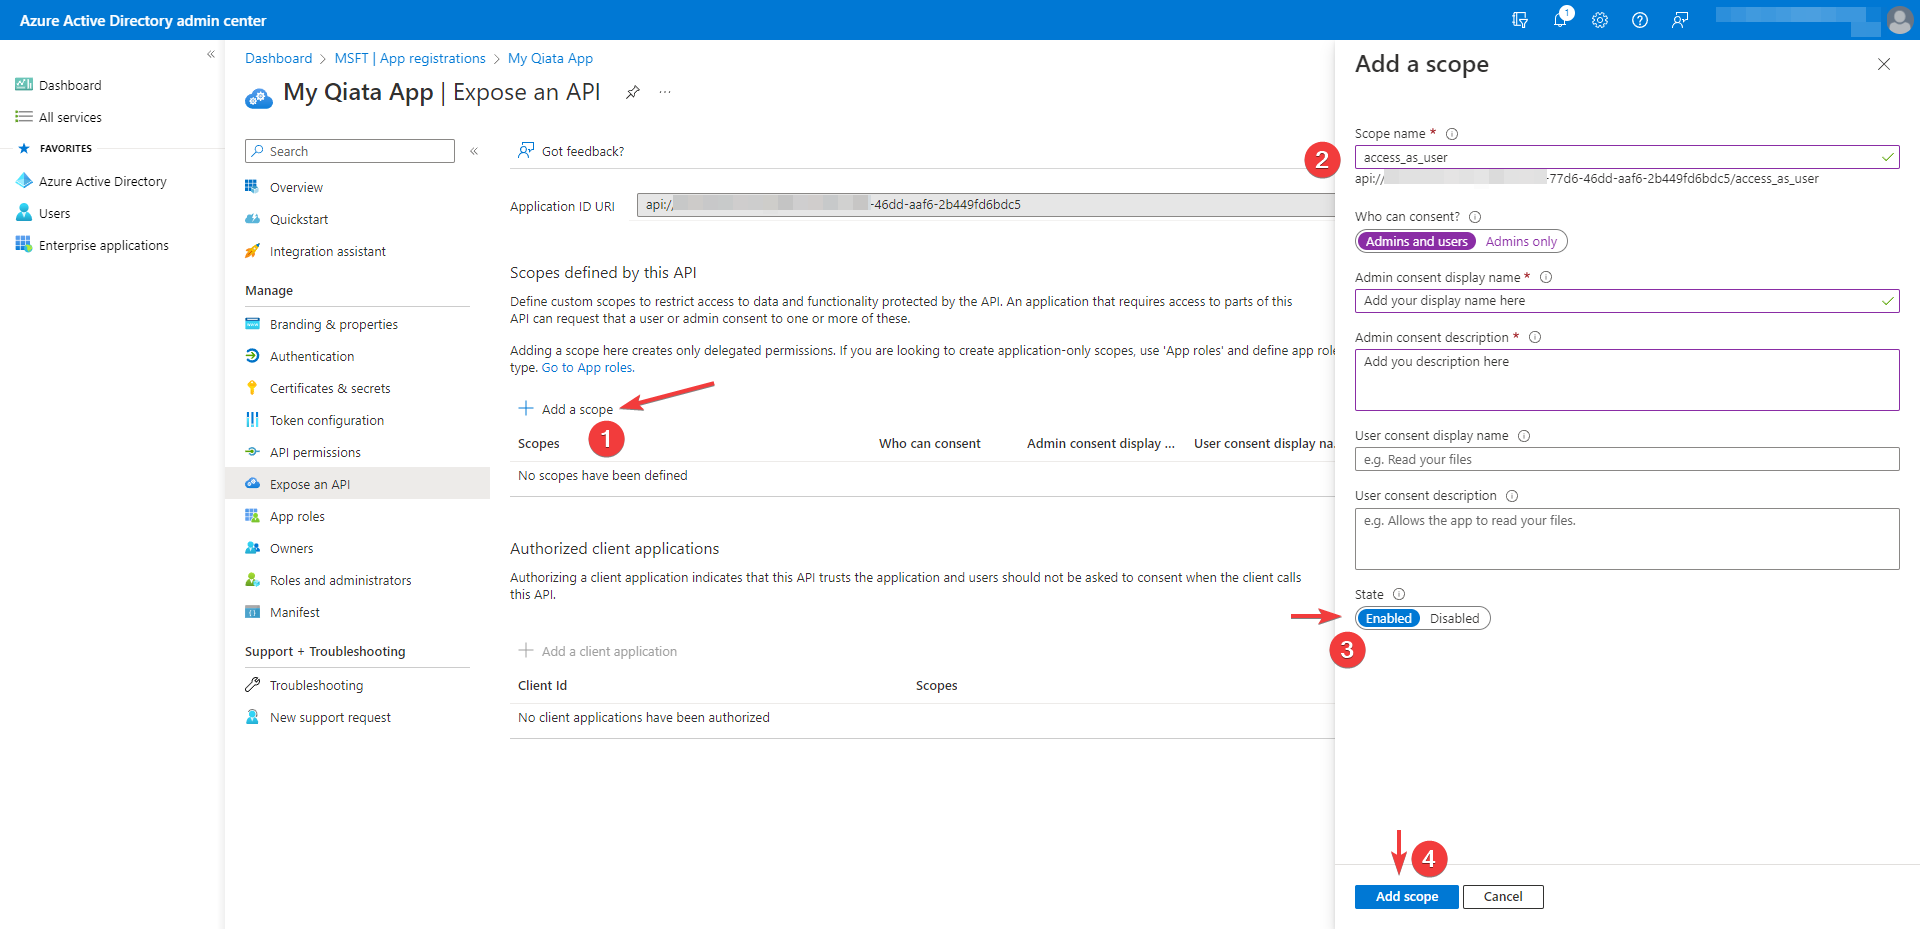
- From Expose an API-Page select Add a scope
- In the Add a scope pane, set the scope name to access_as_user, Who can consent? to Admins and users
- Make sure the state is
enabled - Click on Add scope
Add a client application
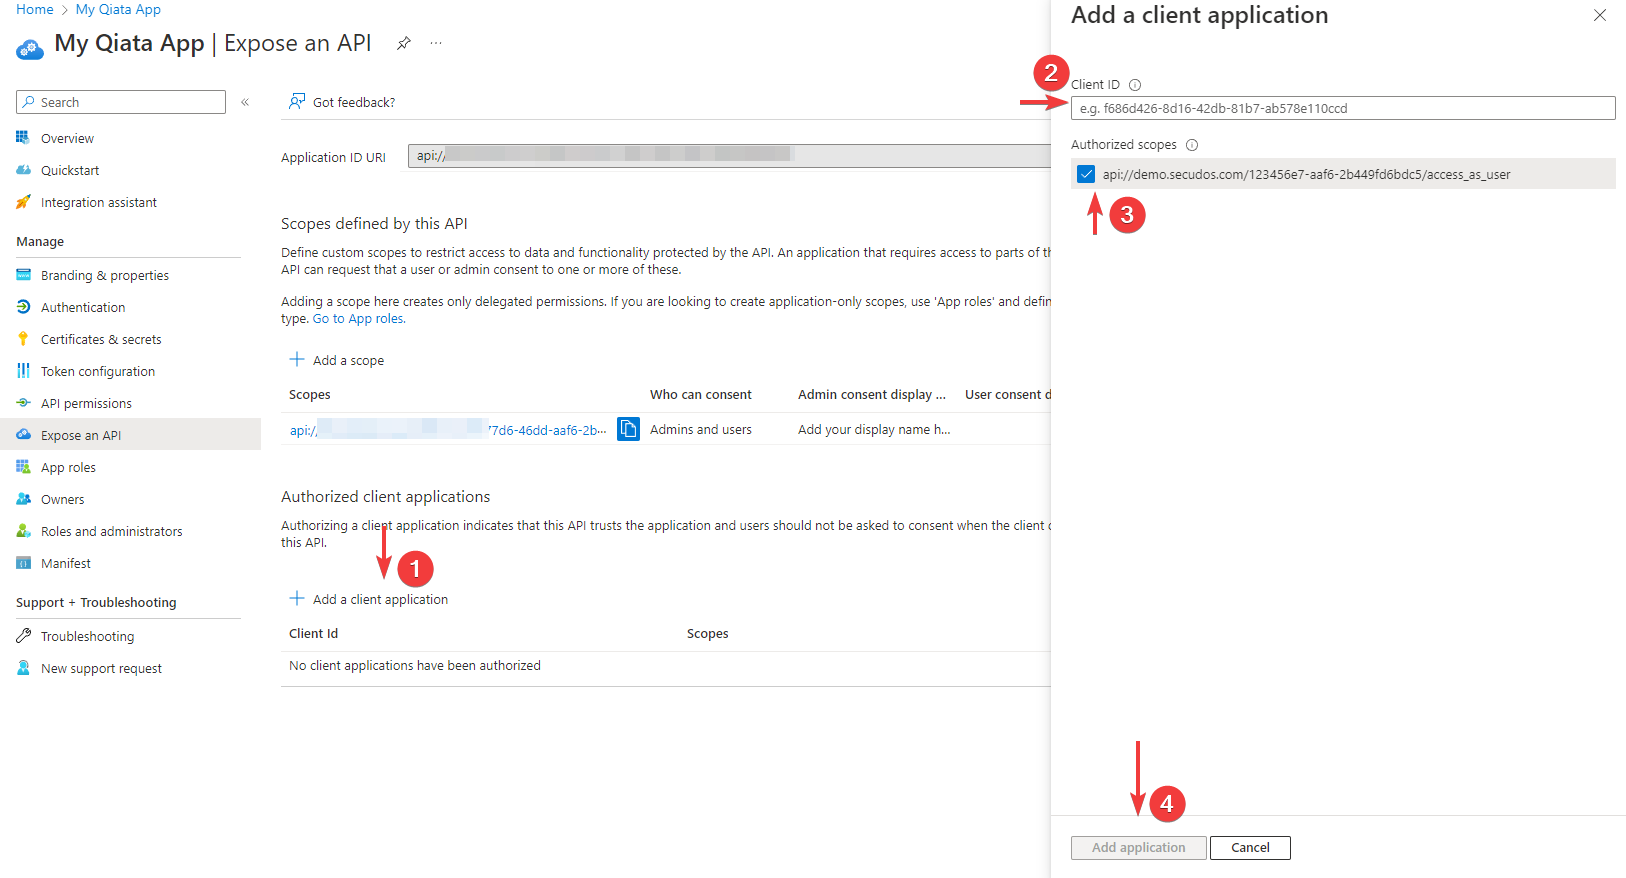
- In the Client ID, type
ea5a67f6-b6f3-4338-b240-c655ddc3cc8e. This value preauthorizes all Microsoft Office application endpoints - Select the scope created in the previous point and activate it
- Click on Add application
Add API permissions
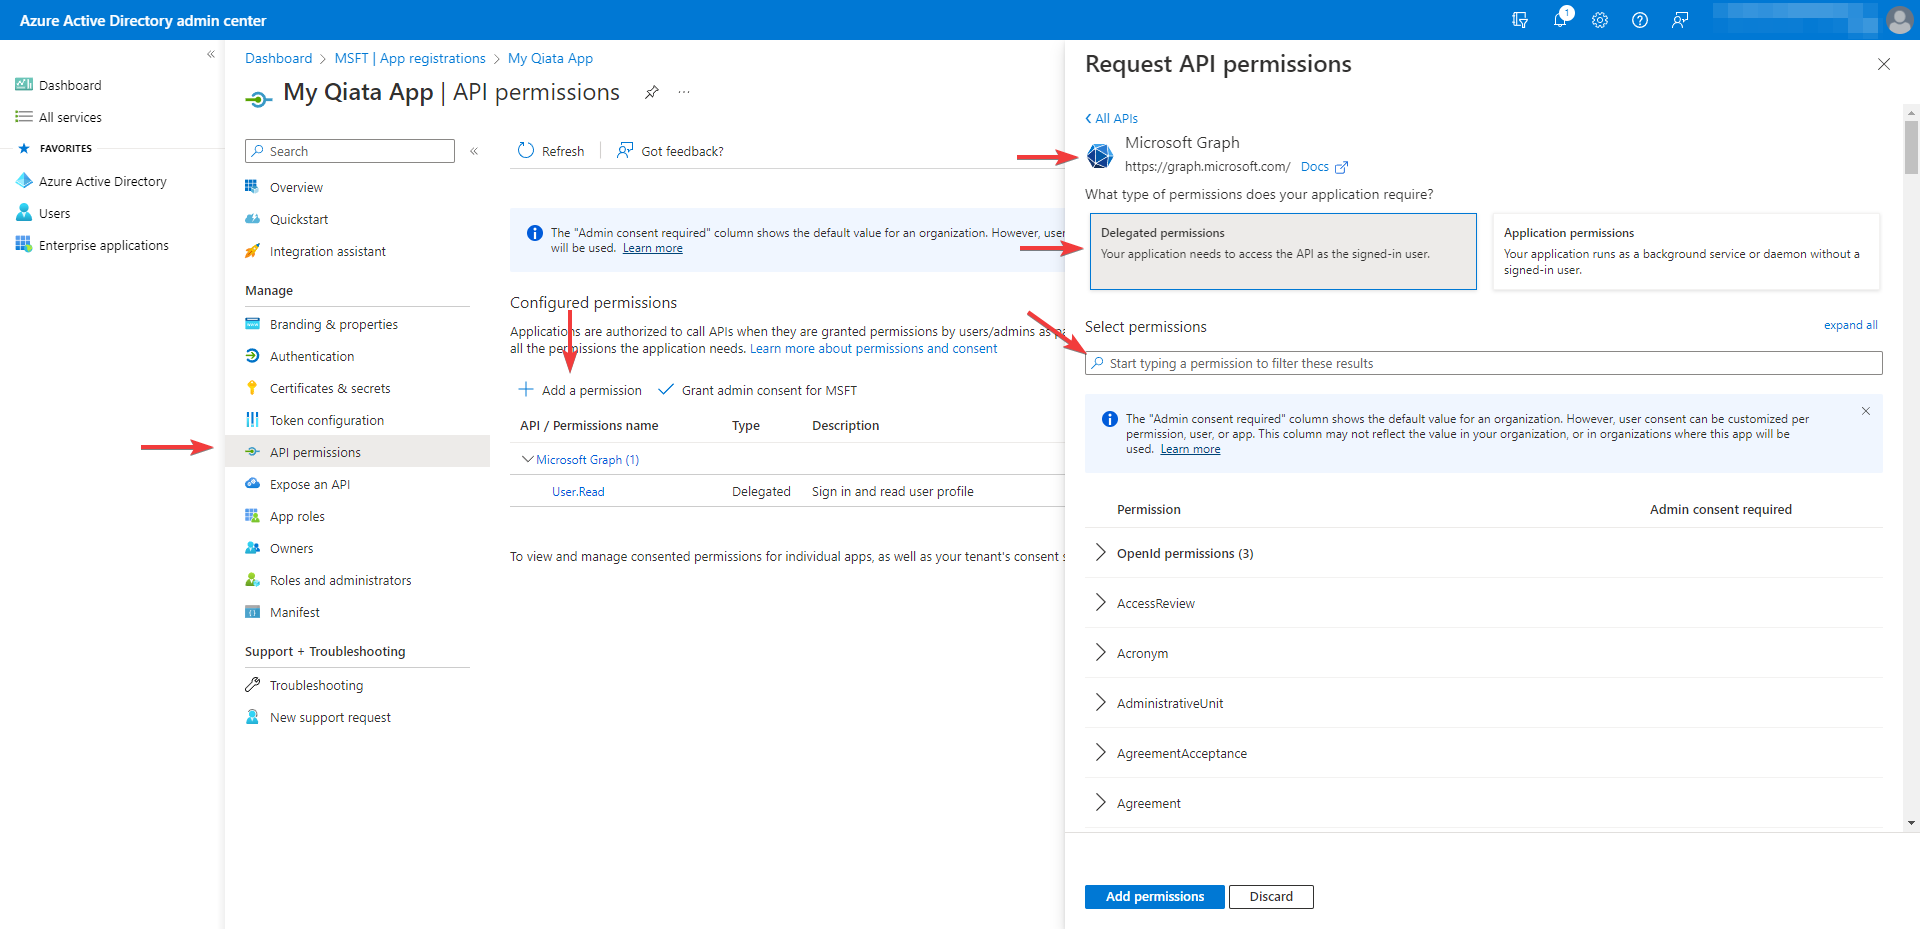
- Select API permissions
- Click on Add a permission
- Select Microsoft Graph
- Select Delegated permissions
- In the Select permissions search box, search for the following permission:
- At OpenId permissions choose
email,openidandprofile - At Group choose
Group.ReadAll - At Mail choose
Mail.ReadWrite
The Mail.ReadWrite permission is required starting with Qiata version 4.22 (Add-In 1.6), as the transfer summary is no longer saved via EWS request, but instead via Microsoft Graph.
- After selecting the permissions select Add permissions
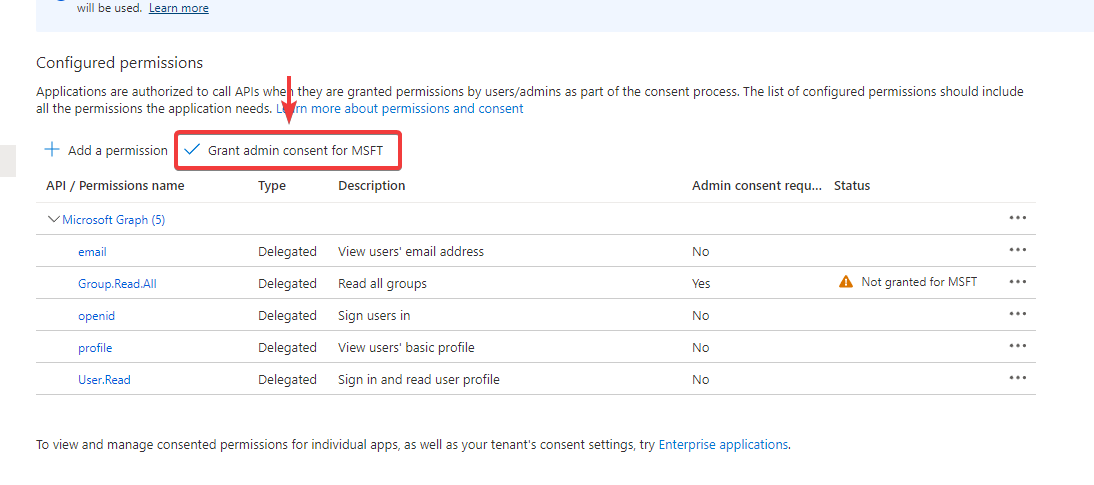
Select Grant admin consent for "YOUR TENANT". Select Yes for the confirmation that appears.
Configure access token version
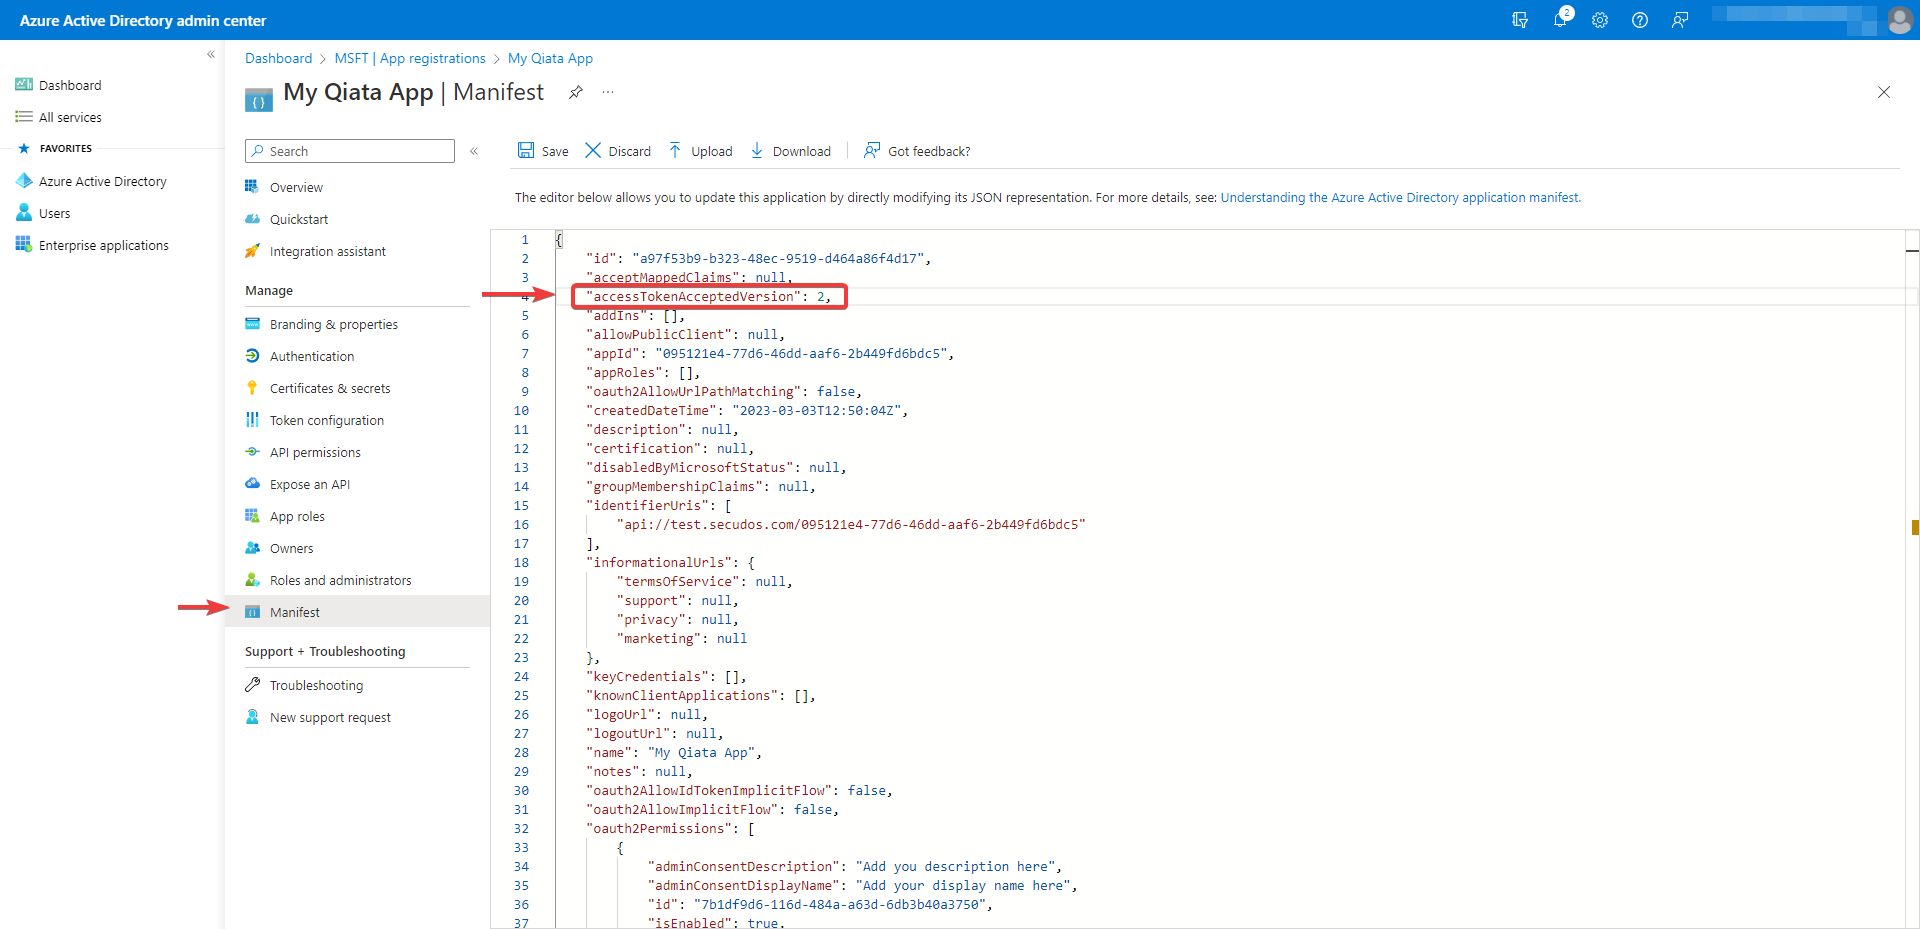
- Select Manifest from the left pane
- Enter 2 as the value for the
accessTokenAcceptedVersionproperty (usually this isnull) - Select Save to finish the registration