meloki AdminPACK
Introduction
meloki is a local AI instance on the scope7 hardware that was developed specifically for customers and offers easy access to powerful AI solutions. This documentation describes the functionality of the meloki AdminPACK.
The meloki software and AI solutions are installed on the primary NVMe drive. An additional drive is available. It is used for backups, but you can also use it to store input or output data (RAG files, audio files, or your own models).
This document assumes that you have already set up your meloki system using our Quick Start Guide.
meloki Login
The admin panel requires an authenticated user.
 Log in with meloki as the username and meloki as the password.
meloki Admin Panel
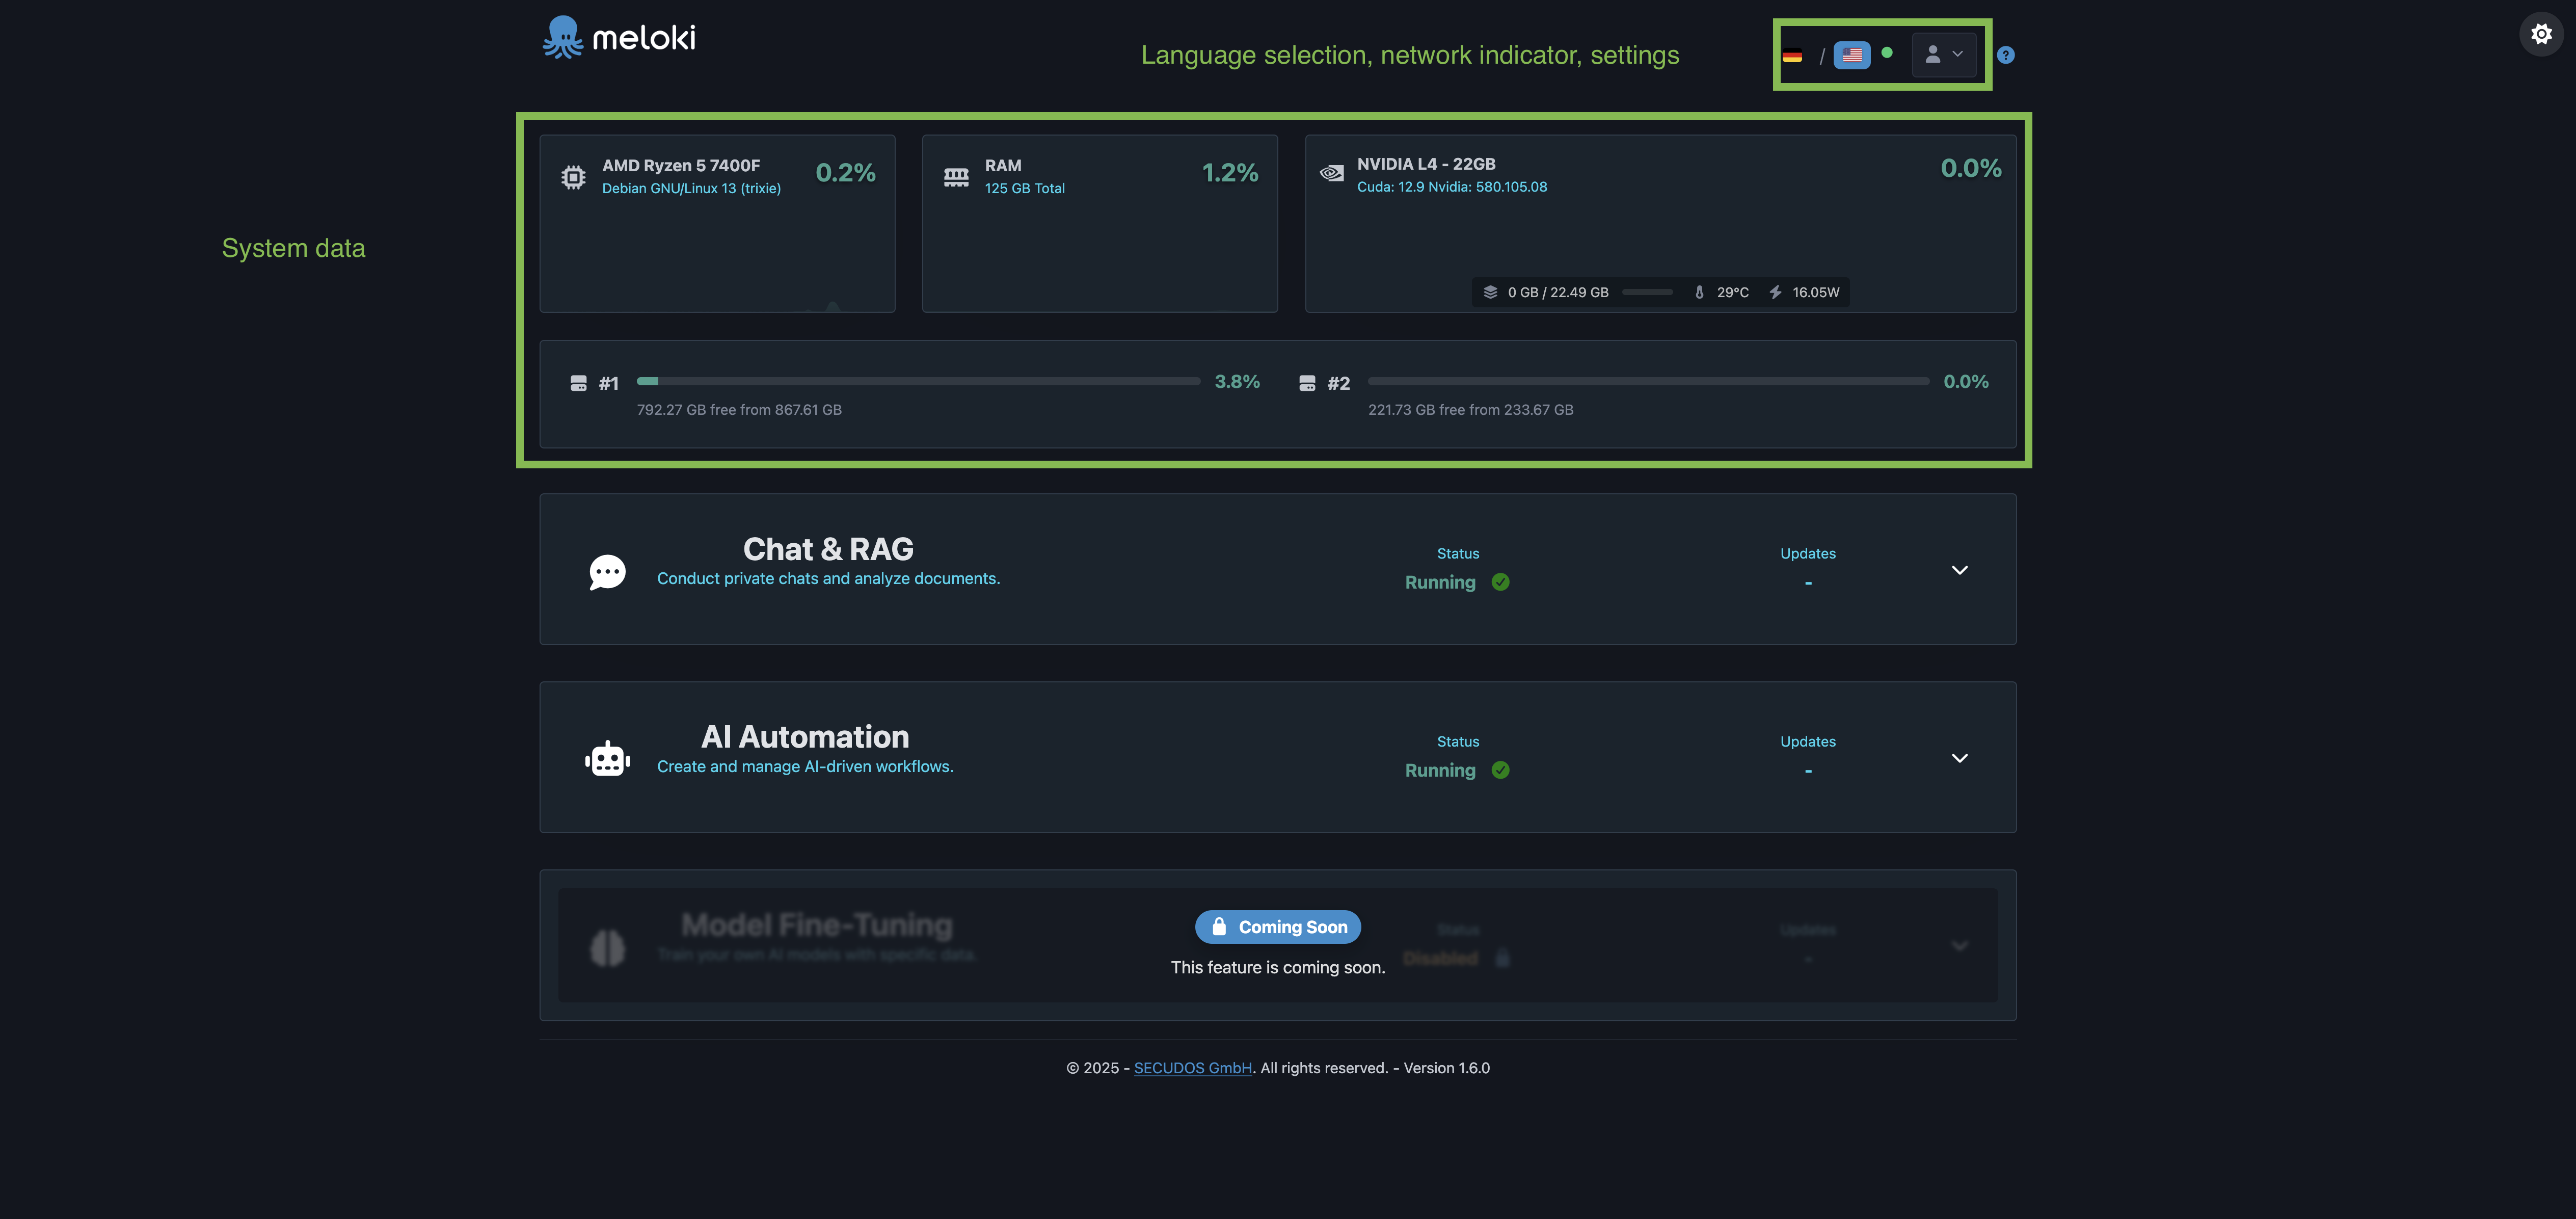 The meloki Admin Panel is your overview of the currently running AI solutions and offers system settings, updates, and backups.
You can view the operating system version and the currently running NVIDIA driver for your graphics card.
The system utilization information allows you to view the current utilization (CPU, memory, and disk) of the system. We also provide information about the graphics card (GPU and VRAM).
You can choose between German and English via the Language Selection.
The OpenSource AI solutions are divided into individual sections.
Click on a section to open it.
Panel Sections
Example: Chat & RAG
 Here, OpenWebUI is used with Ollama as an open source AI solution.
OpenWebUI is already connected to Ollama. You can start working with it right away, without any additional setup.
The current status indicates whether the application is currently running or stopped.
Other possible statuses are preparing, Downloading Standard Models, Backup Running, or Check Status.
In the Control section, you can enable or disable the application.
If Updates are available, this is indicated in the corresponding column with Available.
You can update the open source solution to the latest version via the Maintenance category and the Update button.
With Show logs, you can view the logs of the respective solution live:
 Here you can choose which logs you want to view from the solutions in use:
meloki-openwebui-1, meloki-ollama-1, and meloki-nginx-1
Click Create backup to start a backup of all open-source solutions in this section.
The status will then change to Backup in progress.
The backup process only backs up user data, not the software itself.
Clicking on Restore opens a window that displays all backups that have already been created.

Open the backup list by clicking on Select Snapshot.

After selecting a backup from the list, please confirm the action by clicking on Restore.
The Status will then change to Restoring.
Please note that while a backup or restore is in progress, the solutions will not be available to users.
During Restore, you have the option to limit the restore to individual solutions.
Downloaded models: This refers to your local Ollama models.
User data, chat, and knowledge base: This refers to all user data from OpenWebUI.
If you are unsure what should be restored, we recommend always restoring both together.
Settings
You can open the settings via the Settings button located at the top right.

Updates
System Updates
Updates for the underlying operating system, DOMOS components, and SECUDOS software packages are not managed through the meloki Admin Panel. Instead, they are centrally managed through the DOMOS WebUI.
A detailed description of the update process can be found in the DOMOS documentation:
A valid DOMOS license is required to access update repositories and install updates.
Without a valid license, update information cannot be retrieved and system updates cannot be installed.
Application updates for open-source components such as OpenWebUI, Ollama, or n8n are still managed through the meloki Admin Panel within their respective sections.

Updates are divided into system updates and application updates
You can manually check for new versions via Check for Updates.
If updates are available, they will be displayed here.
Application updates can only be installed in the Admin Panel in the respective section using the Update button.
With the Automatic Updates button, you can specify whether system or application updates should be checked for automatically daily or weekly.
This only checks for updates automatically. No downloads or installations are performed.
Network
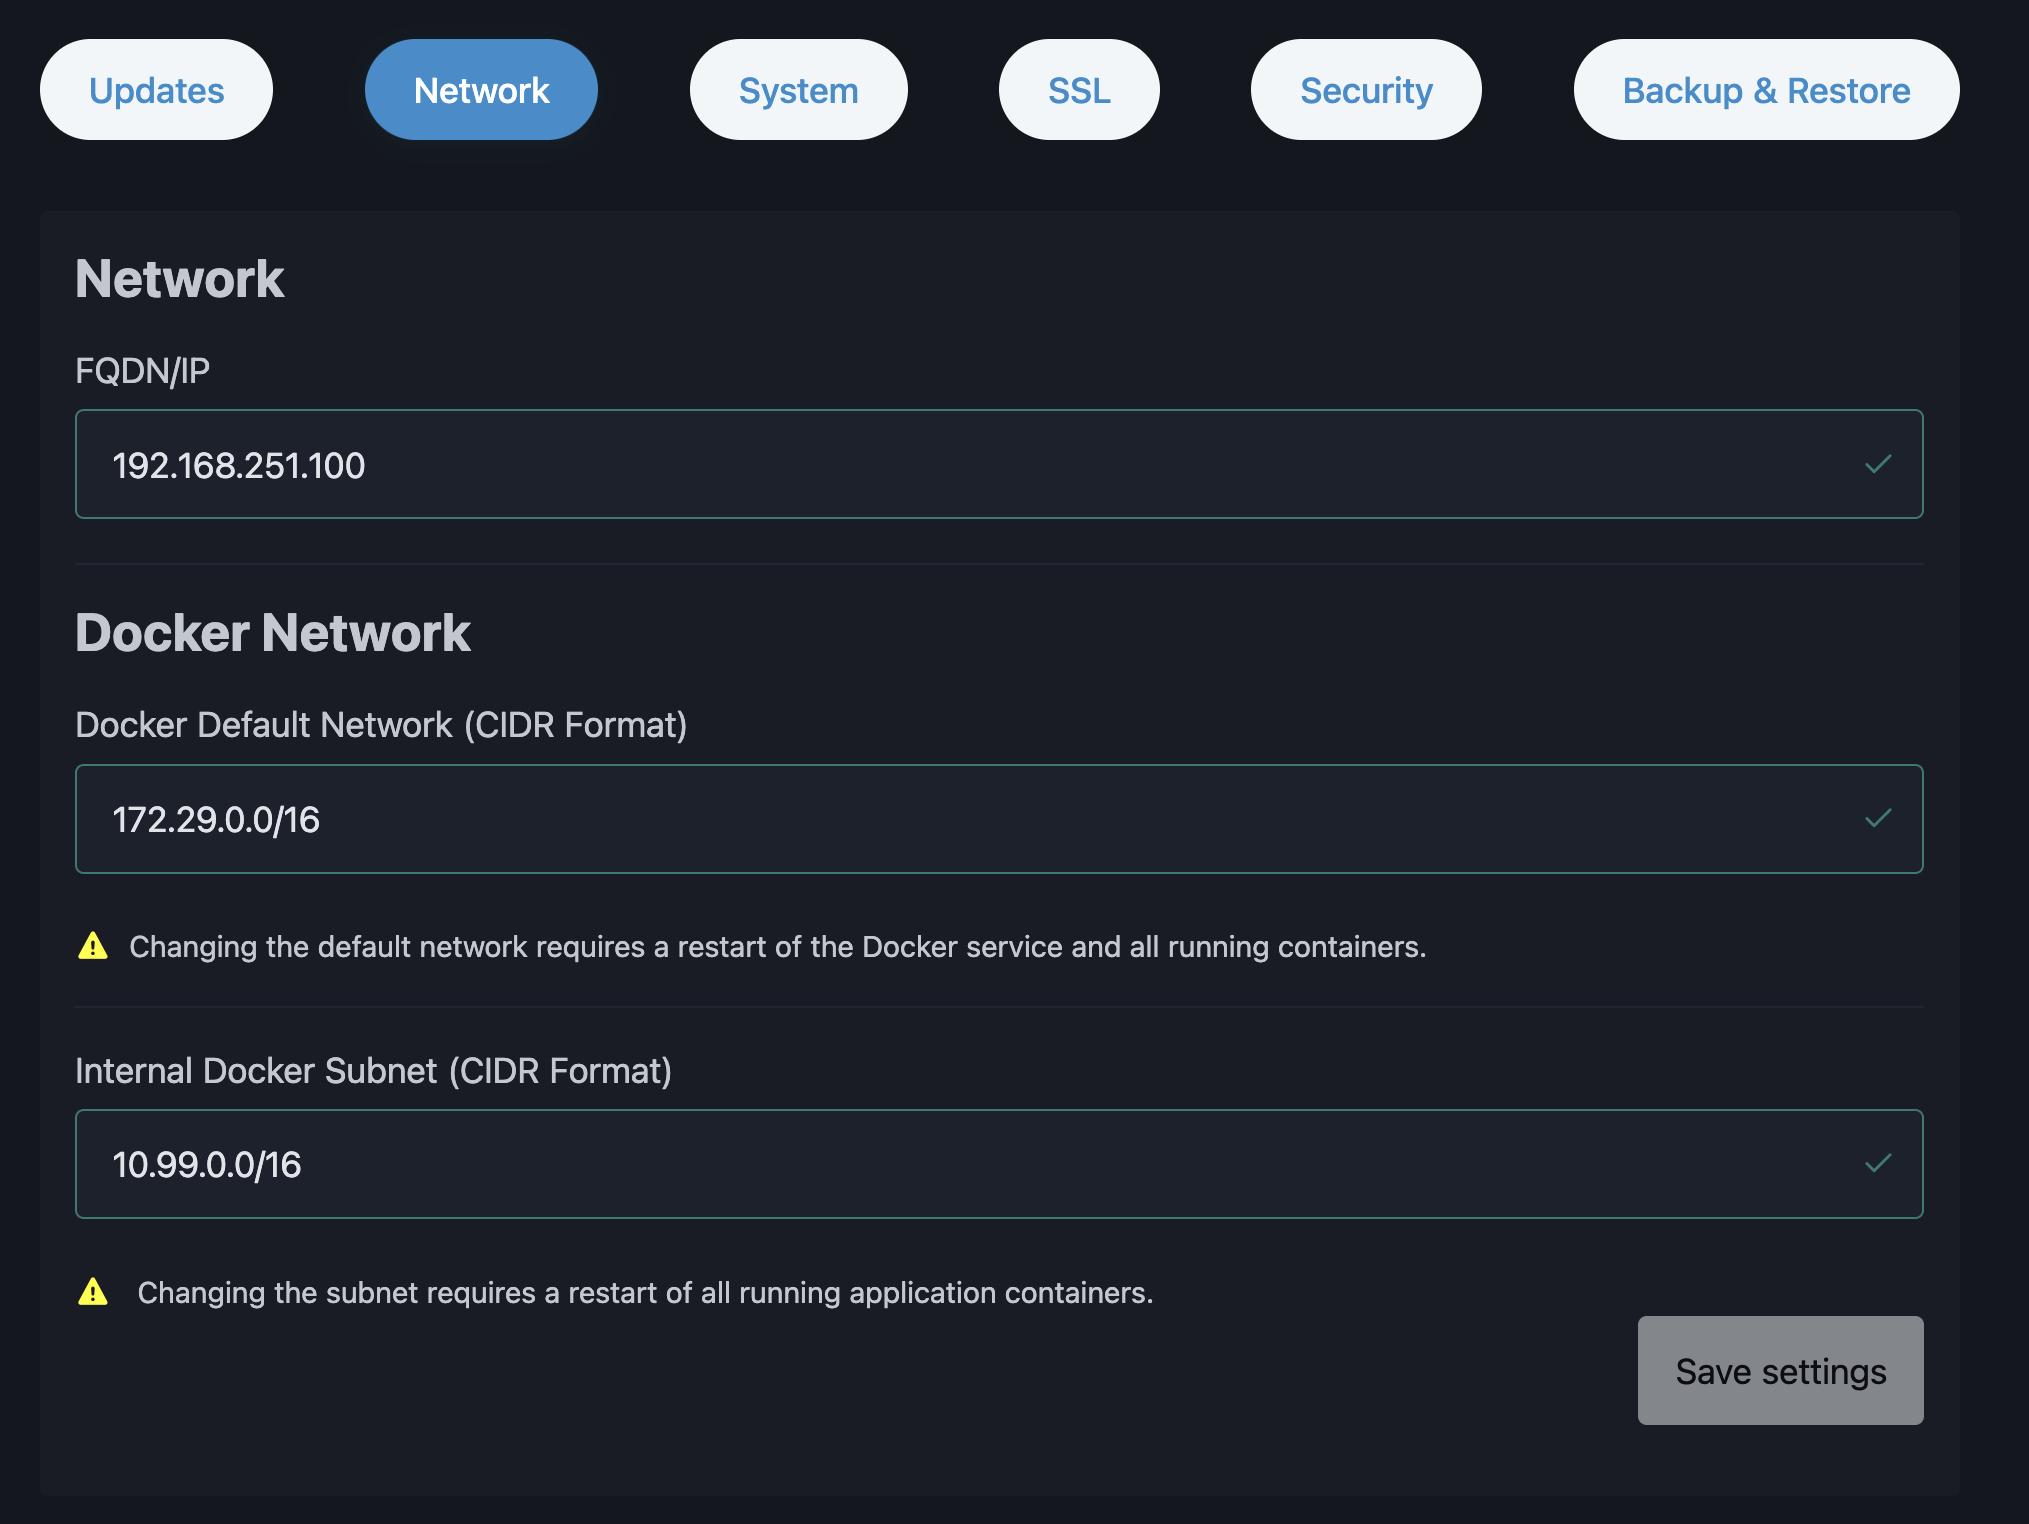 In the Network area, you will once again be presented with the settings that you were able to configure during the initial setup.
Here you can reconfigure the FQDN/IP, Docker default network, and internal Docker subnet at any time. Click Save settings to save your changes.
Please note that changing the network configuration will result in a brief period of unavailability for the applications.
System
 Here you can adjust the time zone to suit your needs.
Click Save settings to save your changes.
SSL
 Here you can upload your own SSL certificates.
The SSL certificate chain is optional.
After making your selection, please click on Upload certificates.
Security
 Here you have the option to change your password.
Enter your current password and the new password twice.
To save, click on Change Password.
It is strongly recommended that you change the initial password from the setup after your first login.
Backup & Restore

Under Automatic Backups, you can specify whether backups are created daily or weekly.
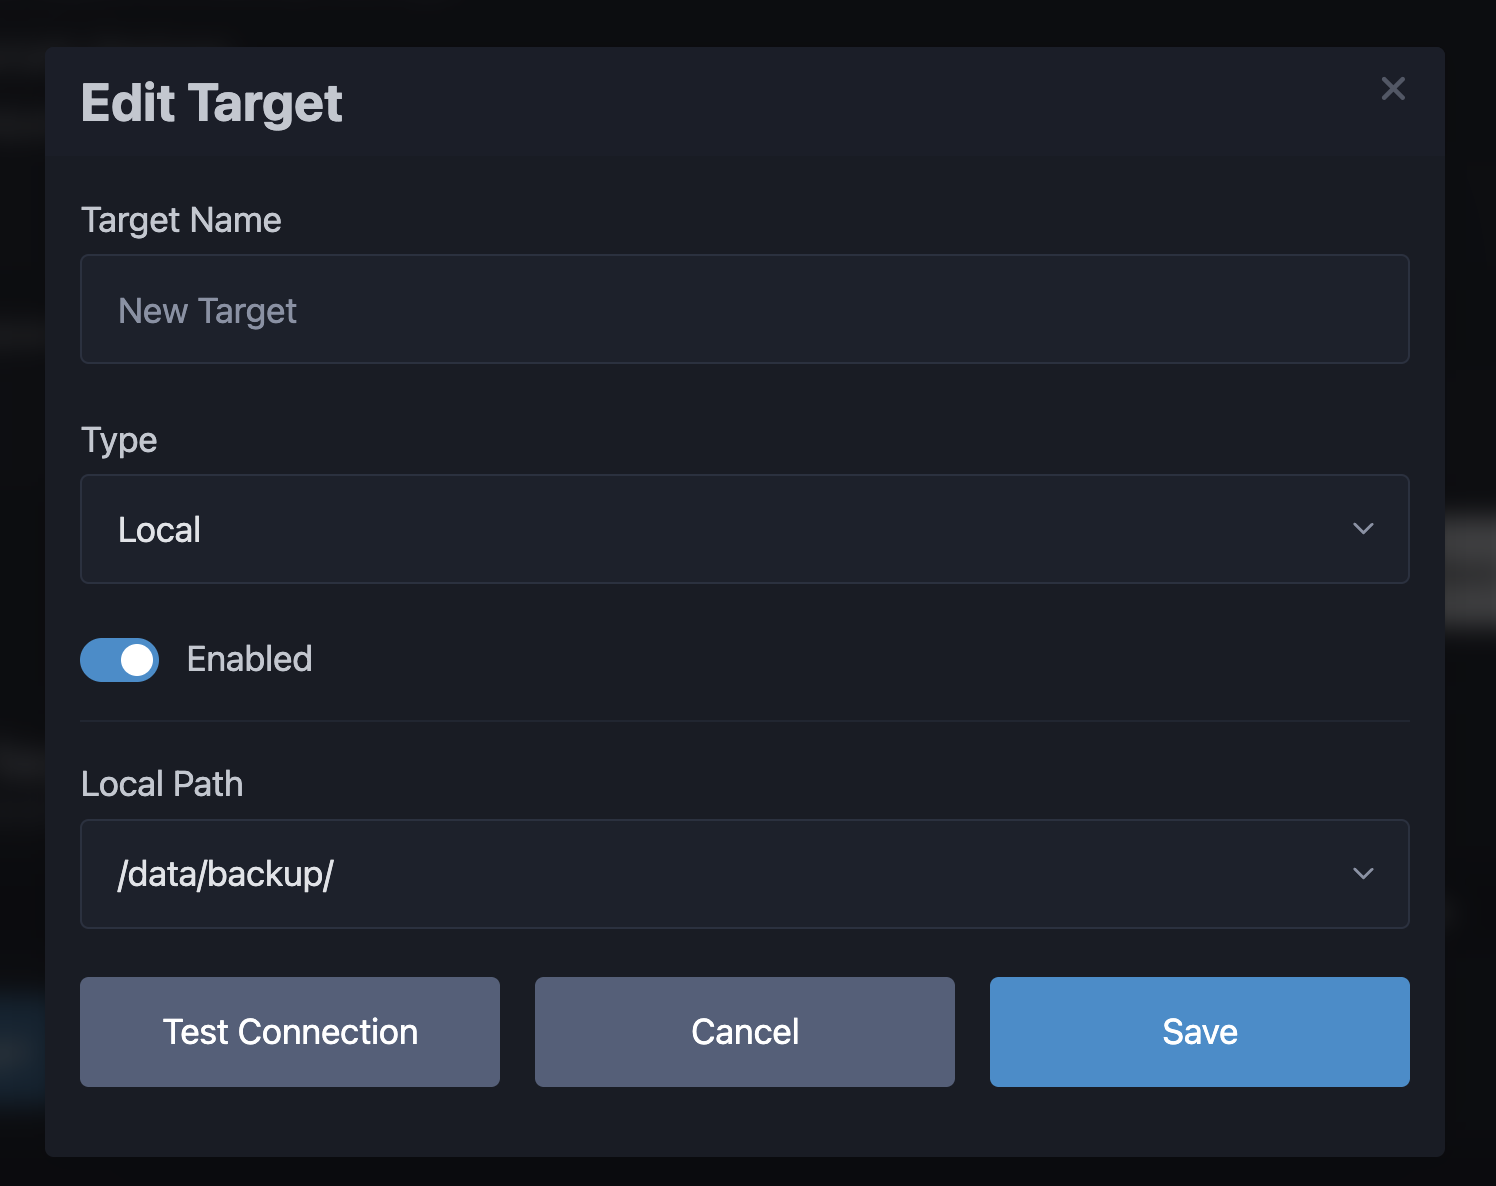
Under add Target /data/backup/ is available as a storage location.
This is the separate 1TB SSD in your Meloki.
Additional backup storage locations are planned!
Enter your personal secret password under Backup Password.
Please remember your password. It will be needed again if the system hard drive needs to be reinstalled.
Then save your entries with the Save settings button.